· 4 min read
Kotlin for Android (II): Create a new project

After getting a light idea of what Kotlin is and what it can do for us, it´s time to configure Android Studio to help us develop Android apps using Kotlin. It requires some steps that only need to be done first time, but some other Gradle configurations will need to be done on every new project.
For this set of articles, I´ll be creating a reduced version of Bandhook, an app I created some time ago, which will basically connect to a music rest API and return some info about a set of bands. Go to Bandhook Kotlin on Github and take a look at the code.
Create a new project and download Kotlin plugin
Just create a basic Android project with an activity using Android Studio, the same way you would do for a regular project.
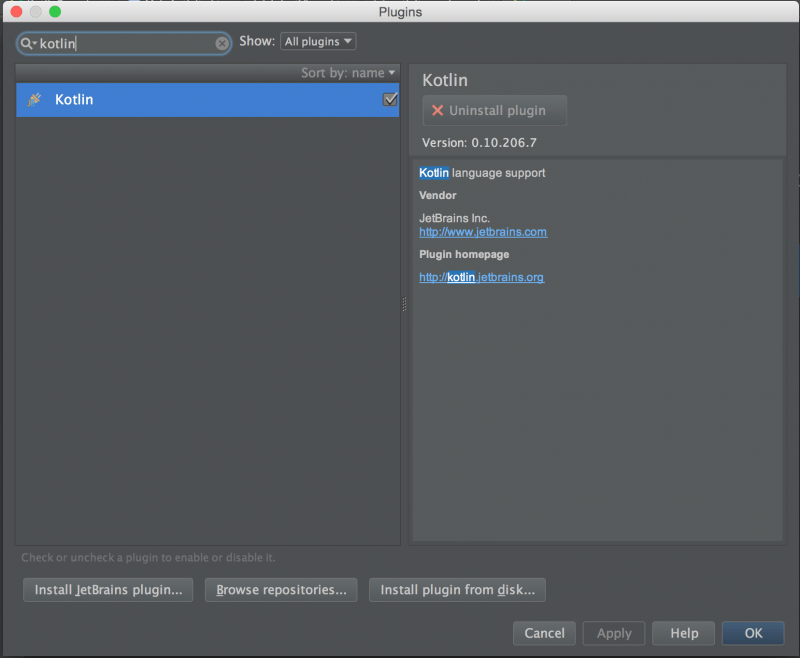
Once done, first thing you´ll need is to download Kotlin plugin. Go to Android Studio preferences and search plugins. Once there, use search again to find Kotlin plugin. Install and restart the IDE.
Add Kotlin plugin dependency to your application build.gradle
The root build.gradle needs a new dependency that will be required to use the Kotlin plugin in our main module:
buildscript {
    repositories {
        jcenter()
    }
    dependencies {
        classpath "com.android.tools.build:gradle:1.5.0"
        classpath "org.jetbrains.kotlin:kotlin-gradle-plugin:1.0.1"
    }
}
Configure module build.gradle
First, apply Kotlin plugin:
apply plugin: 'com.android.application'
apply plugin: 'kotlin-android'
Then, add the Kotlin library to your dependencies:
dependencies {
    compile fileTree(dir: 'libs', include: ['*.jar'])
    compile 'org.jetbrains.kotlin:kotlin-stdlib:1.0.1'
}
That should be all. However, if your project is mixing both Java and Kotlin files, I recommend you to create a folder for Kotlin sources:
android {
    compileSdkVersion 23
    buildToolsVersion "23.0.1"

    ...

    sourceSets {
        main.java.srcDirs += 'src/main/kotlin'
    }
}
Alternatively, you can skip this step, and after doing next ones, use this Android Studio action:
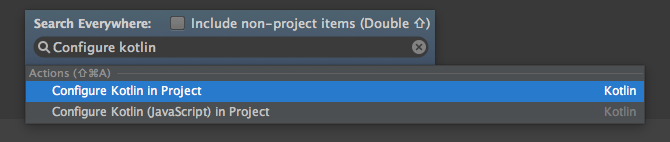
I prefer doing it manually to keep my Gradle files organized, but this second option could be easier.
Create Kotlin folder
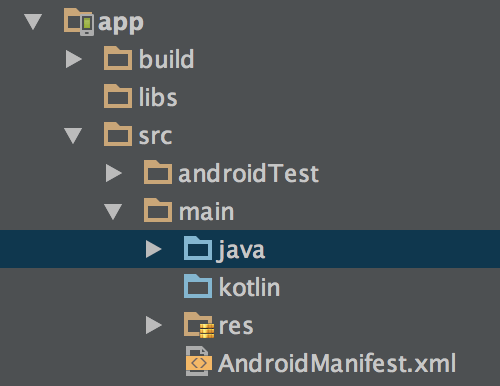
You can skip this point if you don’t mix Java and Kotlin files. Creating the folder will be easier if you change the project visualization from ‘Android’ to ‘Project’. Go to ‘app->src->main’ and create a folder called ‘kotlin’:
Convert Java activity to a Kotlin file
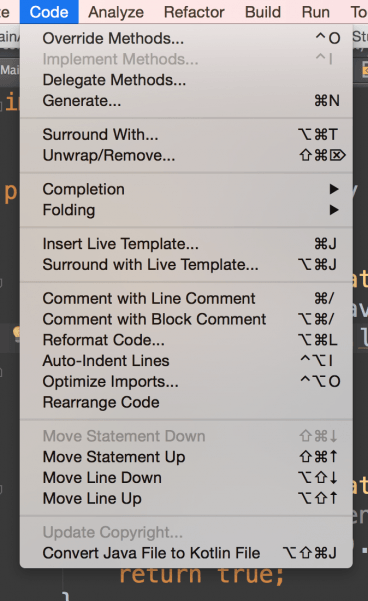
Kotlin plugin can convert from Java to Kotlin classes. We can convert our current activity to a Kotlin class very easily from ‘Code’ menu, by choosing ‘Convert Java File to Kotlin File’:
IDE will suggest to move new file to the Kotlin folder. Click on ‘Move File’ (or move it manually if you don´t see the option).
You will get a very similar code translated to Kotlin. I suggest taking a look until you understand the differences:
class MainActivity : ActionBarActivity() {

    override fun onCreate(savedInstanceState: Bundle?) {
        super.onCreate(savedInstanceState)
        setContentView(R.layout.activity_main)
    }

    override fun onCreateOptionsMenu(menu: Menu): Boolean {
        // Inflate the menu; this adds items to the action bar if it is present.
        getMenuInflater().inflate(R.menu.menu_main, menu)
        return true
    }

    override fun onOptionsItemSelected(item: MenuItem): Boolean {
        // Handle action bar item clicks here. The action bar will
        // automatically handle clicks on the Home/Up button, so long
        // as you specify a parent activity in AndroidManifest.xml.
        val id = item.getItemId()

        //noinspection SimplifiableIfStatement
        if (id == R.id.action_settings) {
            return true
        }

        return super.onOptionsItemSelected(item)
    }
}
Main differences
Just taking a look at the previous code, we can see some direct differences. There are many more we´ll be discovering in next posts:
- Use of colon instead of the word ‘extends’
- Explicit use of ‘override’: in Java, we can use an annotation to make our code more clear, but it´s not a condition. Kotlin will force us to use it.
- Use of ‘fun’ for functions: Kotlin is an object-oriented functional language, so it will be very similar to other languages such as Scala. Java methods are represented as functions.
- Function parameters use a different nomenclature: Type and name are written the other way round and separated by a colon.
- Optional use of semicolons: we don´t need to finish our lines with a semicolon. We can if we want to, but it can save a lot of time and make our code cleaner if we don´t do it.
- Other small details: In the introductory article, I already talked about the ’?’ symbol on. This indicates the parameter can be null. Nullity is handled differently from what we are used to in Java.
Conclusion
Though we can think using a new language will be very difficult, Kotlin is being created by the JetBrains team to be the easiest and most interoperable language to cover the needs Java lacks. As Android Studio is also based on a JetBrains product, it will be very easy to integrate into this IDE and start working with it.
Next article will cover some tips and tricks to make our life easier when developing Android apps with Kotlin.


![[LIVE] Answering all your questions: MVVM, Work-Life balance, career progression, football..? 😂](/_astro/stencil.wordpress-3.B__ZrLFz.jpg)