· 13 min read
Flutter: Mobile Development for Busy People, Lara Martin [Droidkast LIVE 05]

Lara Martin came to tell us about her beginnings and her experience as an Android Developer at Berlin.
Her talk was about Flutter! And how Flutter allows programmers and designers to experiment and play with their app’s user interface, and create experiences that run at 60 fps with the look and feel of the Android and iOS native components.
1. The video
You can watch the full episode here:
https://www.youtube.com/watch?v=Xwcp5qYVvkQ
2. The interview: Main questions
- Tell us a little about your story. Where are you from, how was your childhood, and what led you to start in software development?
- How was your career progression to what it is today?
- How’s your life in Berlin nowadays?
- What are the most difficult things that you had to overcome to get to where you are today?
- And what helped you the most?
- I recently read your article about the need for juniors in our industry. What did you detect that pushed you to write this article?
- I’ve seen that you love sketchnoting. In fact, you have a site with Miguel Beltrán about it, sketchnoting.dev. Can you tell us a little more about what it is, and how it helps you?
- Do you have time for other non-tech related hobbies? Or at least, not software related?
- When you think about your long-term future, how do you see it? Do you think you’ll continue in software development for the rest of your career?
- If you had to recommend just one thing to our listeners, about anything, IT related or not, what would be?
Questions from the Audience:
Nate Ebel: What’s your favorite and least favorite things about Flutter
3. Links mentioned during the interview
- Twitter: https://twitter.com/lariki
- Sketchnoting: https://sketchnoting.dev/sketchnotes/
3. Transcription
Prerequisites
- Your system should have Android studio installed.
- Your system should have Flutter and Dart installed on Android studio.
- Basic Android ecosystem understanding.
- Basic understanding of Java or any other OOPs programming language is required.
How will this tutorial help
- Will help you in learning the basics of Flutter SDK.
- Will help you in learning Dart programming language. There is no introduction of Dart in this, But it is easier to understand. After this, you can learn more about Dart yourself.
What is Flutter?
Flutter allows you to create beautiful native apps on Android and iOS from a single codebase. Flutter is hugely customizable, and basically, you can build any UI you want. It offers native performance & quality with high-velocity development with multi-platform reach.
Focus areas of Flutter:
- Rich developer experience. e.g. you will be able to see changes running almost instantly.
- Expressive UI Toolkit. Lots of tools to create almost anything you can imagine.
- Native iOS and Android apps. It compiles to native code. Performance is expected to be the same as a native app built from scratch in Kotlin, Java and Swift.
Flutter supports native app behaviour of iOS and Android, e.g. In Android new app screens open from bottom to up, and for iOS, it opens from right to left. Flutter supports it, so if you run your app on iOS it will work as an iOS app and on Android, it will run like an Android app.
What I most like about Flutter:
- The speed of deployment. Changes are visible instantly.
- Modern language - Dart. Easy to start learning and use. Of course, each language has its own nitty gritty which can only be mastered over a period of time.
- Built-in rich UI components which are not readily available in Android SDK.
- Simple architecture. Every UI component is a widget. No need of visual editors as changes are seen instantly. Architectures available on Flutter like BLOC are similar to MVP which you may have using already. You can continue using MVP like architectures to build apps in Flutter.
Programming in Reactive pattern
Here we see how we program in Flutter:
Simple app with raised button:
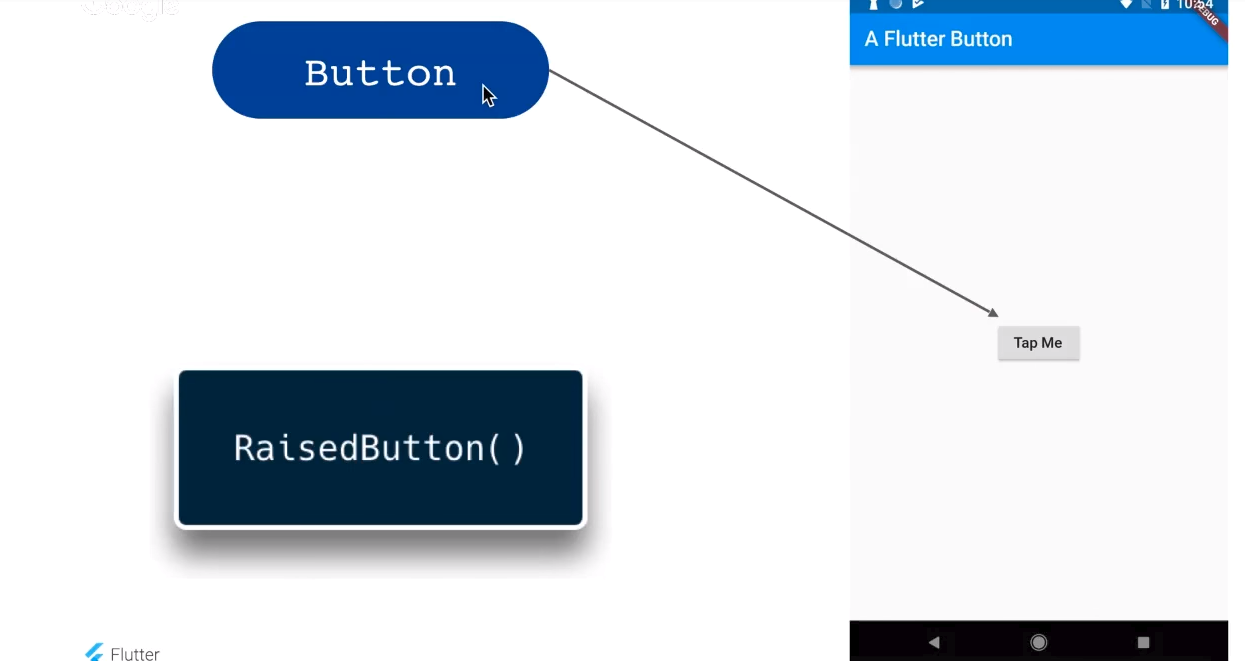
We will use a simple RaisedButton widget which will create a raised button.
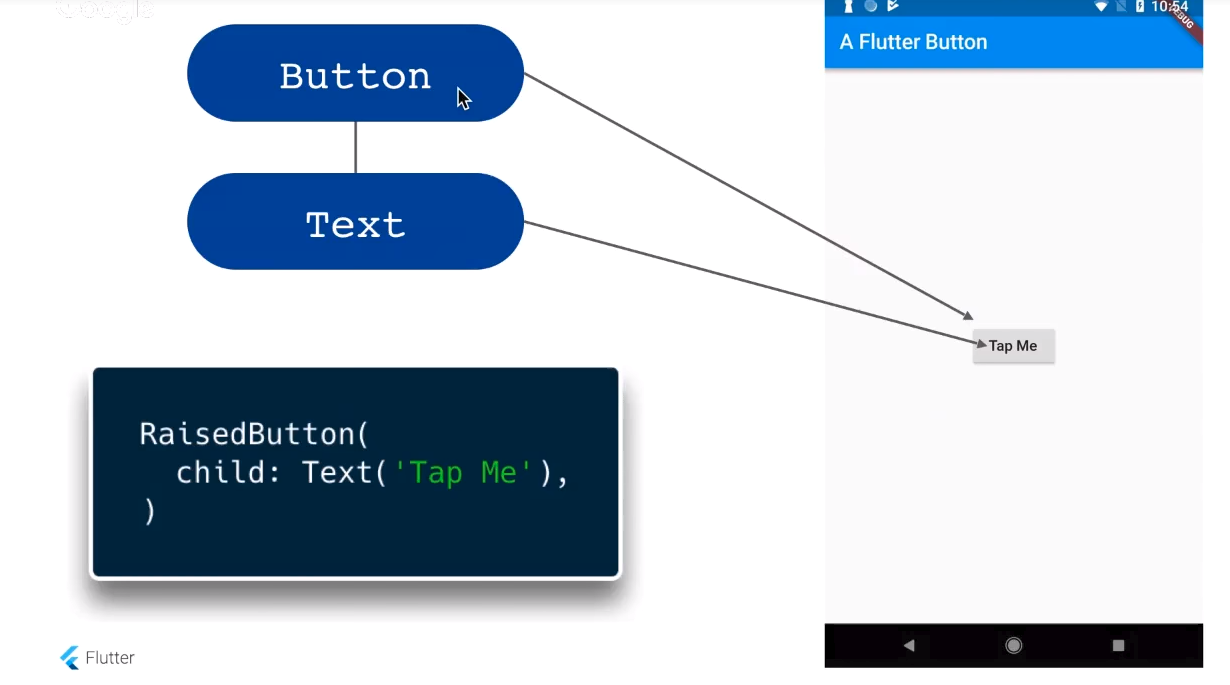
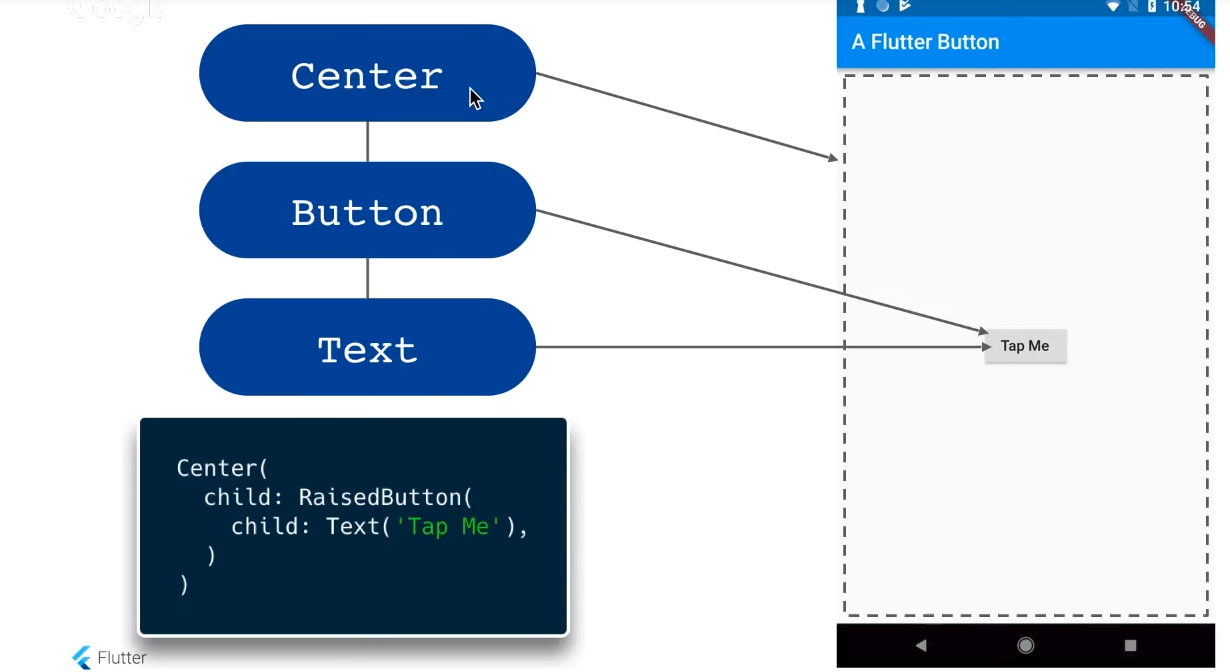
In the above image, you see button has “Tap Me” text and to create it that way we need to have another widget Text as a child of RaisedButton. It means your widgets can have children and those children can have other widgets. To centre the button, make the RaisedButton as a child of Center widget.
Scaffold widget
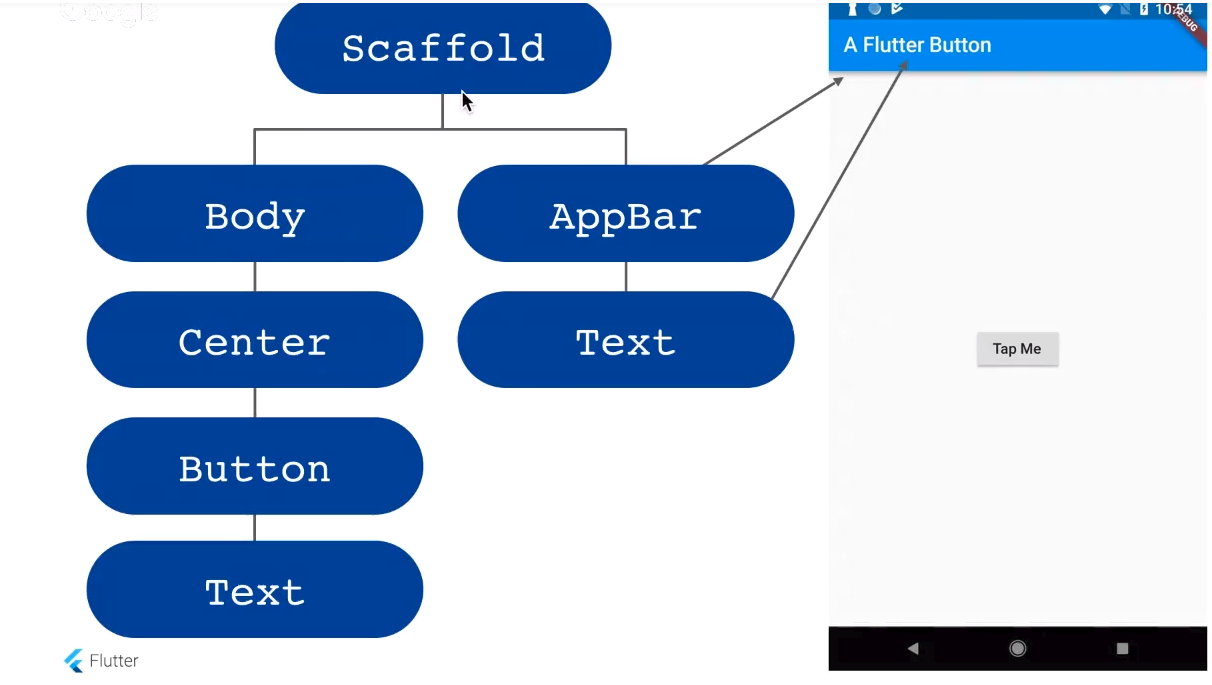
The skeleton of this screen is another widget called Scaffold. This widget implements the basic material design visual layout structure. It can have several components, and we are using some of them below.
Source code for creating the above button
So basically there is a MaterialApp widget which has a Scaffold widget which contains all the other widgets shown in images above.
import 'package:flutter/material.dart';
void main() => runApp(MyApp());

class MyApp extends StatelessWidget {
 @override
 Widget build(BuildContext context) {
   return MaterialApp(
     title: 'Welcome to Flutter',
     home: Scaffold(
       appBar: AppBar(
         title: Text('A Flutter Button'),
       ),
       body: Center(
         child: RaisedButton(
             child: Text("Tap Me"),
             onPressed: (){}),
       ),
     ),
   );
 }
}
The Dog House Application
The whole source code is available here: https://github.com/laramartin/thedoghouse. Go ahead and clone this repo. Just remember that source code here is in the final state after adding things we will do in this tutorial. You can modify this code to see what we are doing here.
Things to be kept in mind while following this tutorial:
- The programming language is Dart.
- The data folder contains all the data models we are using in our application.
- main.dart contains the entry point of Flutter application and other classes.
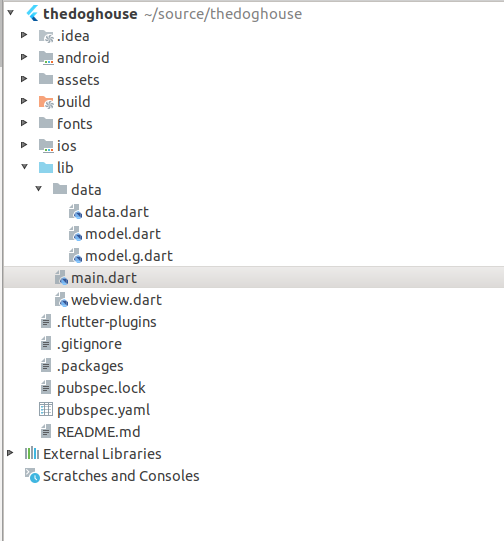
Below image shows the project code structure.
Entry point
The entry point is the main function in main.dart file.
void main() async {
 List<Doggo> dogs = await AdoptableDoggos.fetchDoggos();
 return runApp(ScopedModel<AdoptableDoggos>(
   model: AdoptableDoggos(dogs),
   child: MaterialApp(
     theme: ThemeData(
       primaryColor: Colors.brown,
       accentColor: Colors.deepOrange,
       fontFamily: 'HappyMonkey',
     ),
     home: DogList(),
   ),
 ));}
Fetching the dogs list
Before we run the app, we are fetching the list of Doggo’s so that we should have the data to show in our app.
List<Doggo> dogs = await AdoptableDoggos.fetchDoggos();
First, let’s look at how we are fetching the data that we are going to see in the application. In data.dart we have a class called AdoptableDoggos which has a function fetchDoggos() which will return the list of dogs.
static Future<List<Doggo>> fetchDoggos() async {
 var response = await http.get(
     'https://ra-api.adoptapet.com/v1/pets/featured?location=32830&type=dog-adoption');
 Map json = jsonDecode(response.body);

 var list = Response.fromJson(json);
 list.body.forEach((Doggo d) => _dogLookup[d.id] = d);
 return list.body;
}
Future is an object that signifies a delayed computation. With async, we are marking this function as asynchronous, and we are indicating that this function might take some time. Then we are making an HTTP request and then decode the response to get the list.
The Response is a class in the model.dart file which is serialising the data for us. We are using JsonSerializable annotation which takes care of generating code for a class to/from JSON. model.g.dart is created automatically for us, and you don’t need to write all the code to convert to/from JSON.
Running the app
Take a look at main function again.
void main() async {
 List<Doggo> dogs = await AdoptableDoggos.fetchDoggos();
 return runApp(ScopedModel<AdoptableDoggos>(
   model: AdoptableDoggos(dogs),
   child: MaterialApp(
     theme: ThemeData(
       primaryColor: Colors.brown,
       accentColor: Colors.deepOrange,
       fontFamily: 'HappyMonkey',
     ),
     home: DogList(),
   ),
 ));}
runApp() is a function which inflates the given widget and attaches it to a screen. Here we are using ScopedModel which is extended from StatelessWidget and has the state available throughout the app from all the points in our app. We are attaching AdoptableDoggos model to the widget and MaterialApp as child widget. After that, we are setting the theme of the child widget. We are specifying home of MaterialApp child widget as DogList widget. Every widget has to override build() which will be called to get the inflated widget.
Let’s see how DogList widget looks like:
class DogList extends StatelessWidget {
 @override
 Widget build(BuildContext context) {
   return Scaffold(
     appBar: AppBar(
       title: Text("Who's in the dog house?", style: headerStyle),
       leading: const Icon(FontAwesomeIcons.bone),
       actions: <Widget>[FavoritesButton()],
     ),
     body: ListView(
       children: <Widget>[]
     ),
   );
 }
}
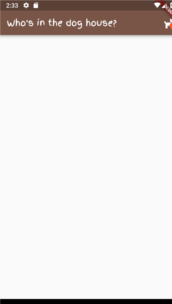
Now hit the run button and it should like:
Adding a bone icon in appBar with hot reload
class DogList extends StatelessWidget {
 @override
 Widget build(BuildContext context) {
   return Scaffold(
     appBar: AppBar(
       title: Text("Who's in the dog house?", style: headerStyle),
       leading: const Icon(FontAwesomeIcons.bone),
       actions: <Widget>[FavoritesButton()],
     ),
     body: ListView(
       children: <Widget>[]
     ),
   );
 }
}
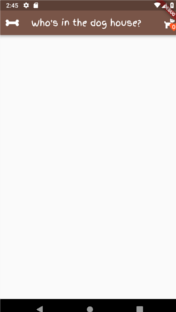
The leading parameter adds an icon before the text in appBar, after making this change hit the hot reload button and you should see the changes instantly.
Adding dogs list via DogListItem to the DogList widget
Remember we added the AdoptableDoggos model in our ScopedModel which can be accessed anywhere in our code. Now its time to get the model using context and map each dog to DogListItem and create a list out of it in DogList class by adding new children widget has a list of DogListItems.
class DogList extends StatelessWidget {
 @override
 Widget build(BuildContext context) {
   return Scaffold(
     appBar: AppBar(
       title: Text("Who's in the dog house?", style: headerStyle),
       leading: const Icon(FontAwesomeIcons.bone),
       actions: <Widget>[FavoritesButton()],
     ),
     body: ListView(
       children: ScopedModel.of<AdoptableDoggos>(context)
           .dogList
           .map((dog) => DogListItem(dog))
           .toList()
     ),
   );
 }
}
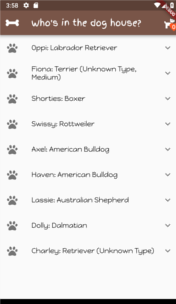
Expansion Tile for the Dog list item
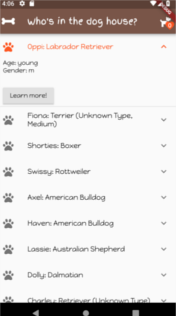
Let’s look at the DogListItem widget which inflates an ExpansionTile with title dog name and its breed name. The child of ExpansionTile is a row of the array of widgets with only widget _dogDescription which is nothing but a simple column widget of age and gender.
class DogListItem extends StatelessWidget {
 DogListItem(this.dog);
 final Doggo dog;

 @override
 Widget build(BuildContext context) {
   return ExpansionTile(
     leading: const Icon(FontAwesomeIcons.paw),
     title: Text('${dog.name}: ${dog.breeds.primaryBreedName}'),
     children: [
       Padding(
         padding: const EdgeInsets.symmetric(horizontal: 16.0),
         child: Row(
           children: <Widget>[
             _dogDescription(dog, context),
           ],
         ),
       ),
     ],
   );
 }

 Widget _dogDescription(Doggo dog, BuildContext context) {
   return Column(
     crossAxisAlignment: CrossAxisAlignment.start,
     children: <Widget>[
       Text('Age: ${dog.age}'),
       Text('Gender: ${dog.gender}'),
       _buttonOpenWebView(context, dog)
     ],
   );
 }
}
After making this change, you will see a collapsible tile for each dog in the list.
Adding image in ExpansionTile row for each dog
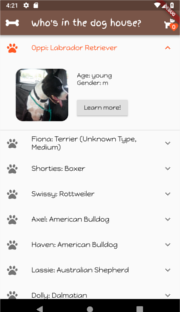
Now we will add an image in children array of row widget which already has _dogDescription widget. The DogImage is a widget for showing the image.
@override
Widget build(BuildContext context) {
 return ExpansionTile(
   leading: const Icon(FontAwesomeIcons.paw),
   title: Text('${dog.name}: ${dog.breeds.primaryBreedName}'),
   children: [
     Padding(
       padding: const EdgeInsets.symmetric(horizontal: 16.0),
       child: Row(
         children: <Widget>[
           DogImage(dog), // DogImage added
           _dogDescription(dog, context),
         ],
       ),
     ],
   );
}

class DogImage extends StatelessWidget {
 DogImage(this.dog);
 final Doggo dog;
 @override
 Widget build(BuildContext context) {
   return Padding(
     padding: const EdgeInsets.all(20.0),
     child: Container(
       height: 120.0,
       child: ClipRRect(
         borderRadius: BorderRadius.circular(16.0),
         child: FadeInImage.memoryNetwork(
           placeholder: kTransparentImage,
           image: dog.media.images.first.url,
         ),
       ),
     ),
   );
 }
}
With Flutter having an image with a round edge is as easy as specifying border-radius in ClipRRect widget. Let’s look at DogImage code. ClipRRect creates a rounded rectangular clip. You can play with border-radius to increase or decrease the curviness.
class DogImage extends StatelessWidget {
 DogImage(this.dog);
 final Doggo dog;
 @override
 Widget build(BuildContext context) {
   return Padding(
     padding: const EdgeInsets.all(20.0),
     child: Container(
       height: 120.0,
       child: ClipRRect(
         borderRadius: BorderRadius.circular(16.0),
         child: FadeInImage.memoryNetwork(
           placeholder: kTransparentImage,
           image: dog.media.images.first.url,
         ),
       ),
     ),
   );
 }
}
Opening a second screen to show details of selected dog
To open a second screen, we are going to use Navigator widget. This widget will help us to navigate to a different page.
Widget _buttonOpenWebView(BuildContext context, Doggo dog) {
 return Padding(
   padding: const EdgeInsets.only(top: 24.0),
   child: RaisedButton(
       child: Text('Learn more!'),
       onPressed: () => Navigator.push(
           context,
           MaterialPageRoute(
             builder: (context) => FullDogView(dog: dog),
           ))),
 );
}
We need to call the push method to move to the second screen for which we will pass context and dog. FullDogView is another widget in webview.dart file used to draw the full screen for each dog. Let us see the FullDogView build function which is supposed to inflate this widget and return it for rendering.
@override
Widget build(BuildContext context) {
 return Scaffold(
   appBar: AppBar(
     title: Text('Dog Stats: ${dog.name}', style: headerStyle),
     actions: <Widget>[FavoritesButton()],
   ),
 );
}
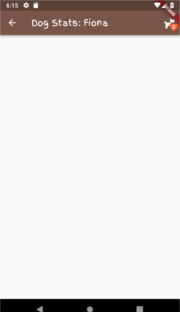
After making above changes let’s click on the Dog Fiona and now you will see the same Scaffold widget with no body component.
Adding body to the dog full screen
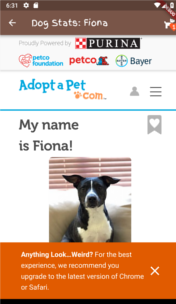
We will use Webview here to load webpages inside your application. To create Webview, we are passing dog URL and configuring javascript mode. Once the page loads, the WebViewController callback is called.
@override
Widget build(BuildContext context) {
 return Scaffold(
   appBar: AppBar(
     title: Text('Dog Stats: ${dog.name}', style: headerStyle),
     actions: <Widget>[FavoritesButton()],
   ),
   body: WebView(
     initialUrl: AdoptableDoggos.dogUrl(dog.id),
     javascriptMode: JavascriptMode.unrestricted,
     onWebViewCreated: (WebViewController webViewController) {
       _controller.complete(webViewController);
     },
   ),
   floatingActionButton: _bookmarkButton(),
 );
}
Now we have modified the FullDogView to load the dog details from dog URL. Now if you click dog Fiona, you will see that widget inflates with all the details.
Adding widgets over Webview
Scaffold widget provides a way to have a floating button via floatingActionButton property, and we will use that. After making the changes for floating widget, our code looks like this:
class FullDogView extends StatelessWidget {
 FullDogView({@required this.dog})
     : _controller = Completer<WebViewController>();

 final Doggo dog;
 final Completer<WebViewController> _controller;

 @override
 Widget build(BuildContext context) {
   return Scaffold(
     appBar: AppBar(
       title: Text('Dog Stats: ${dog.name}', style: headerStyle),
       actions: <Widget>[FavoritesButton()],
     ),
     body: WebView(
       initialUrl: AdoptableDoggos.dogUrl(dog.id),
       javascriptMode: JavascriptMode.unrestricted,
       onWebViewCreated: (WebViewController webViewController) {
         _controller.complete(webViewController);
       },
     ),
     floatingActionButton: _bookmarkButton(),
   );
 }

 _bookmarkButton() {
   return FutureBuilder<WebViewController>(
     future: _controller.future,
     builder:
         (BuildContext context, AsyncSnapshot<WebViewController> controller) {
       return FloatingActionButton(
         child: const Icon(Icons.favorite),
         onPressed: () async {
           final model = ScopedModel.of<AdoptableDoggos>(context);
           var foundDog = AdoptableDoggos.urlToDog(await controller.data.currentUrl());
           model.addFavorite(foundDog ?? dog);
           Scaffold.of(context).showSnackBar(
             SnackBar(content: Text('Favorited ${dog.name}!')),
           );
         },
       );
     },
   );
 }
}
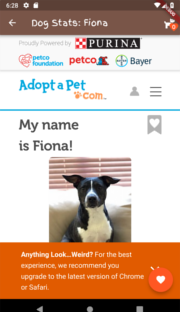
Now lets run this and output is shown below.
Counting the no of favourite dogs
We have added a class FavoritesButton widget shown one icon and counts the number of favourite dogs you have marked. rebuildOnChange parameter helps to update the count every time Webview widget inflates.
class FavoritesButton extends StatelessWidget {
 @override
 Widget build(BuildContext context) {
   return IconButton(
     icon: Stack(
       overflow: Overflow.visible,
       children: <Widget>[
         const Icon(FontAwesomeIcons.dog),
         Positioned(
           top: 10.0,
           right: -10.0,
           child: Stack(
             alignment: AlignmentDirectional.center,
             children: <Widget>[
               Icon(Icons.favorite, color: Colors.deepOrange),
               Text(
                 ScopedModel.of<AdoptableDoggos>(context, rebuildOnChange: true)
                     .favorites
                     .length
                     .toString(),
                 style: TextStyle(
                   fontSize: 13.0,
                   color: Colors.white,
                   fontWeight: FontWeight.bold,
                 ),
               )
             ],
           ),
         )
       ],
     ),
     onPressed: () => Navigator.pushAndRemoveUntil(
         context,
         MaterialPageRoute(builder: (context) => FavoritesPage()),
             (route) => route.isFirst),
   );
 }
}
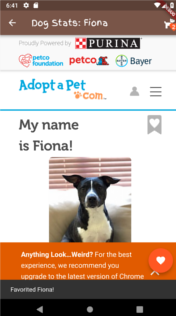
Listing all favourite dogs
It is similar to what we did for Webview where we used the Navigator to switch between screens. Take a look at the code, and you will understand it.
class FavoritesPage extends StatelessWidget {
 @override
 Widget build(BuildContext context) {
   return Scaffold(
     appBar: AppBar(title: Text('Favorite dogs')),
     body: ListView(
         children: ScopedModel.of<AdoptableDoggos>(context)
             .favorites
             .map((dog) => ListTile(
             title: Row(
               children: <Widget>[DogImage(dog), Text(dog.name)],
             ),
             onTap: () => Navigator.push(
                 context,
                 MaterialPageRoute(
                   builder: (context) => FullDogView(dog: dog),
                 ))))
             .toList()),
   );
 }
}
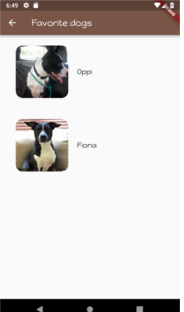
pushAndRemoveUntil() is used here instead of simple push() as we don’t want old information of dog to linger around. You can see the difference yourself by using push() instead.
Conclusion
So today we learnt a few things about Flutter such as :
- Changes can be seen instantly using hot reload.
- ExpansionTile is easier to implement using Flutter.
- Making an HTTP request is also easy using Flutter.
- Rendering a rounded edge photo is as easy as specifying border-radius.
- Navigating between different screens can be done in a few lines of code.
4. Subscribe to Droidkast.LIVE
If you don’t want to miss the following episodes, join the mailing list to receive new updates here: https://droidkast.live
I’ll come back soon with new awesome guests!
